Lelia you asked about my autumn exchange project. Great news came yesterday. I received an email from Julie and the project arrived safely. What a huge relief! Julie posted a picture on her blog so I'll post my pictures too. I took progress pictures as I did the finishing. It was my first time with the technique and I wanted a record of it. It is stitched on 28 ct Bone Jobelan.
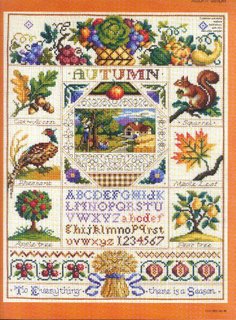
I stitched a small part of a large design, the autumn sampler by Sandy Orton in Issue 25 of Cross Stitch Gold magazine. This is an amazing sampler. If I live long enough, I would like to stitch the whole thing.

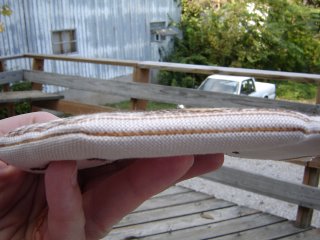
I backstitched around the design and around the piece for the back. This picture shows the front fingerpressed, the back piece and the batting. In the photo there is a piece of mat board between the pieces of batting but in the end I ditched the mat board and went for a softer look. You might also notice that I machine zig-zagged around the edges of the stitched pieces before I cut them out. Narrow seam allowances + raveling fabric = Danger Kitty! I'm paranoid!

With wrong sides together I whipstitched the backstitches together. I didn't put the batting in until I had 5 of the 8 sides closed.


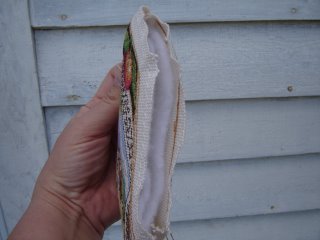
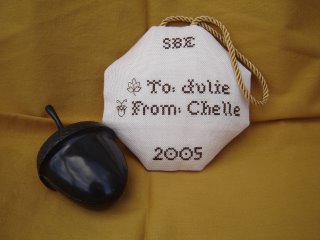
I stuffed loose batting inbetween the two layers. When I got to the top I added a length of store-bought cording. To keep it from unraveling I added a dot of glue to the ends. It was really messy but seemed to work. That's it! Here it is all finished.


This was my first exchange ever and my first time with this technique. All things considered, I'm happy with the way it turned out!
About past posts and comments:
Thanks to everyone for your comments! I found all of your responses to "Finishing Finishes" to be very insightful! It sounds like finishing is the stitcher's Fear Factor - more than anything we don't want to ruin what we've stitched. I also love Anne's reference to a finishing gene - I think mine is missing too! Or maybe it mutated... I forgot to mention Becky; check out her blog if you aren't already a regular reader. She has had an amazing number of finishes this year! Very inspiring to those of us tied up with fear. Karen mentioned getting together with a friend and having a "finishing day" - I think this is a great idea! Joanie when it comes to fear and perfectionism, I think perhaps we are twin daughters of different mothers! Your comment was so "me", I had to laugh out loud. Cathy I'm glad you started your own blog. Your finishes are an inspiration to me!
Vero I promise I'll get the rest of those pictures taken - I hope it doesn't take 2 weeks! I want that room pulled together this week.
Tobie thanks for posting the info for Missy about the tin pins. Missy I hope you are able to find them!
I feel like I'm forgetting something, but I can't think what it is. Guess that is all for today!
9 comments:
Wow, your autumn exchange piece is stunning!!! What a fantastic job you did of it - and I really appreciated the construction photos, being the finishing-phobe that I am! :) I bet your recipient loved it!!
I love your autumn exchange! What a great idea to use that part of the design like that.
Wonderful! First off, thanks for the clear instructions & pictures. I love the octagon and am going to try this soon. Your finishing talents are great!!
When I have to deal with a very narrow seam allowance, I iron in the lightest interface I can get. It holds the linen together while I work, but doesn't affect the softness and drape of the fabric.
And thanks so much for your kind comments on my blog regarding my own finishing attempts!
Your exchange project turned out great! Thanks for posting your step-by-step progress - I'll have to try that!
Delighted your project arrived! Very good pictures & instructions. You did a fantastic job on the stitching and finishing. Woot.
Wowser! That's one cool exchange piece! I am speechless, it's so beautiful! I liked that you took pictures of your construction. You go girl!
Cutest pillow EVER, I'm telling you. Thanks again, I love it.
Chelle, you did an AWESOME job with the autumn exchange piece. Not only was it masterfully stitched, but your finishing was fantastic! I'm sure Julie was honored to have received such a wonderful gift. :)
I love the Autumn sampler pattern!! I just checked the website, and the issue is all sold out...is there a way I could tempt you into selling it or trading for patterns that I may have?
Also, do you know if it's part of a season series? I love Sandy Orton patterns and that one is just gorgeous!!
Thank you,
Courtney Rider
rubberkeyhole@gmail.com
Post a Comment